PNG vs SVG: Why Your Cutting Machine Needs Vector Files
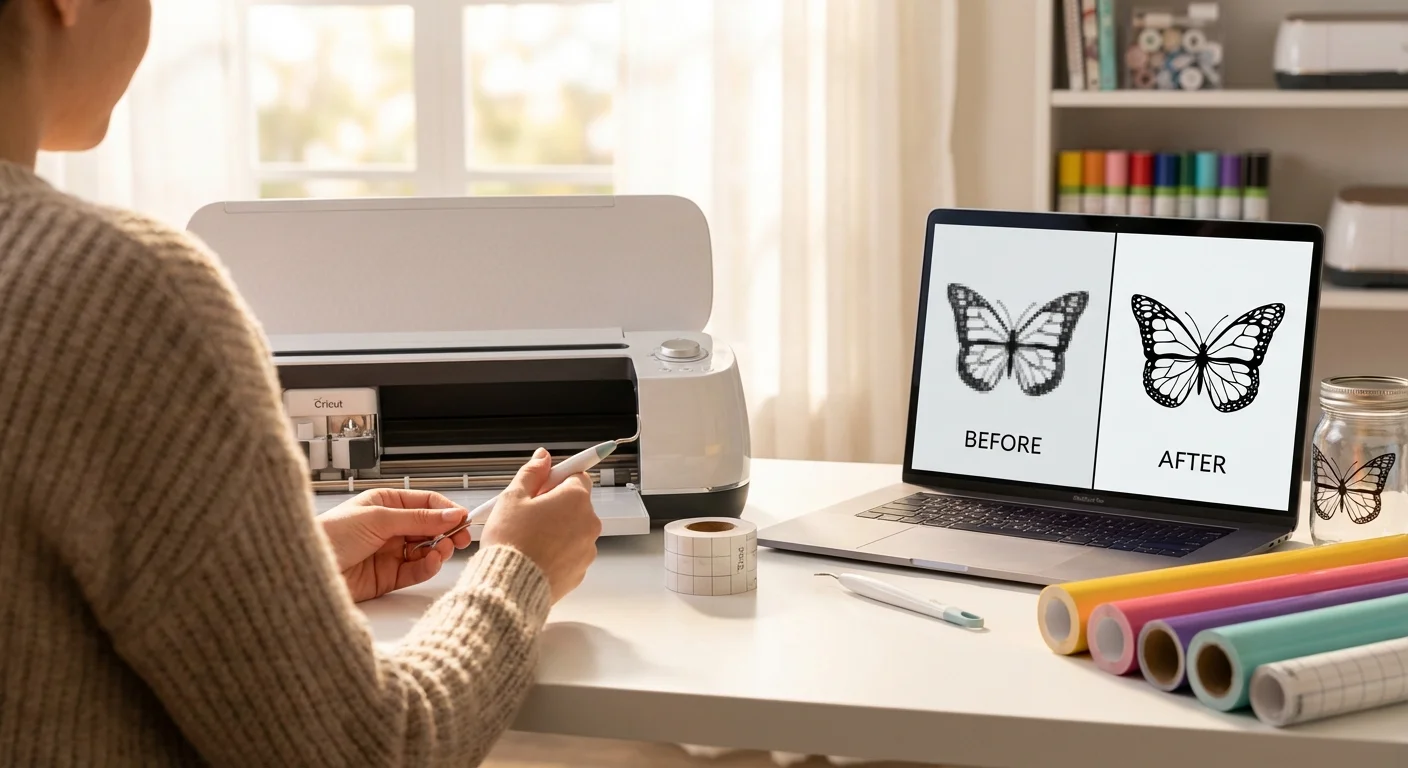
You found the perfect design on Pinterest. You download the PNG. You upload it to Cricut Design Space. And then… it looks terrible. The edges are jagged, the details are mushy, and the trace feature turns your beautiful image into a mess of stray dots and broken lines.
Sound familiar? The problem isn’t your machine. It’s the file format.
PNG vs SVG: What’s the Difference?
PNG (Raster)
A PNG file is made of pixels, tiny colored squares arranged in a grid. A typical image might contain millions of them. When you zoom in, you see the individual squares. When you resize larger, the image gets blurry because there’s no new detail to fill in.
Think of it like a mosaic made of tiles. From far away it looks great, but up close you can see every tile, and making the mosaic bigger just means bigger tiles.
PNGs support transparency (unlike JPGs), which is why they’re commonly used for designs with no background. But transparency doesn’t make them vector files. The edges are still pixel-based.
SVG (Vector)
An SVG file is made of mathematical paths, curves and lines defined by coordinates and equations. The file literally contains instructions like “draw a curve from point A to point B with this curvature.” When you zoom in or resize, the paths are recalculated and the lines stay perfectly smooth at any size.
Think of it like a blueprint. It doesn’t matter if the blueprint is printed on a postcard or a billboard. The instructions are the same, and the result is always sharp.
![]()
Why Cutting Machines Need Paths, Not Pixels
Your Cricut or Silhouette blade doesn’t print anything. It physically drags a blade through material along a path. It needs to know:
- Where to start cutting
- What direction to move
- How curves bend
- Where to lift and reposition
An SVG file contains exactly this information. The blade follows the vector paths like a GPS following a route. A PNG file contains none of it, just a grid of colored dots.
What Happens When You Upload a PNG
When you upload a PNG to Design Space, it doesn’t go straight to your canvas. Instead, you’re taken to a cleanup screen where you have to:
- Remove the background using Select, Erase, and Restore tools
- Adjust color tolerance to separate the design from unwanted areas
- Choose between Cut Image or Print Then Cut
If you choose Cut Image, Design Space traces the image. It looks at color contrast to guess where edges are and creates cut paths along those edges. This process frequently picks up noise, shadows, JPEG compression artifacts, and paper texture, producing rough, jagged paths that look nothing like the original.
The result? A single flat layer with one cut path (the outline). All the internal detail, color separation, and layering information is gone.
What Happens When You Upload an SVG
When you upload an SVG, Design Space reads the paths directly. No cleanup screen. No tracing. No guessing. The file goes straight to your canvas with:
- Layers automatically separated by color. Each color becomes its own element in the Layers panel
- Every path preserved. Internal details, text, decorative elements all intact
- Grouped but editable. Ungroup to move, resize, recolor, or delete individual pieces
The blade follows the exact paths defined in the file. Clean, precise cuts that match your design perfectly.
When PNG Is the Right Choice: Print Then Cut
Here’s something most beginner guides leave out: sometimes PNG is exactly what you want.
Cricut’s Print Then Cut feature works like this:
- You upload a full-color PNG (or JPG)
- Design Space adds registration marks around the image
- You print the image on your home inkjet printer (onto sticker paper, printable vinyl, cardstock, etc.)
- You place the printed sheet on your Cricut mat
- The Cricut’s sensor reads the registration marks and cuts precisely around the printed image
This is how you make stickers, printable vinyl decals, cake toppers, gift tags, bookmarks, and planner accessories. The color comes from your printer ink, not from layering vinyl.
Cut vs Print Then Cut: When to Use Each
| Scenario | Format | Method |
|---|---|---|
| Vinyl decal (single color) | SVG | Cut |
| Multi-layer vinyl (2-5 colors) | SVG | Cut each color separately |
| HTV/iron-on for t-shirts | SVG | Cut (mirror for HTV) |
| Full-color stickers | PNG | Print Then Cut |
| Printable vinyl | PNG | Print Then Cut |
| Cardstock layered projects | SVG | Cut each layer |
| Cake toppers (printed) | PNG | Print Then Cut |
| Wall decals | SVG | Cut |
Rule of thumb: If you’re cutting material into shapes, use SVG. If you’re printing first and cutting around the print, use PNG.
Don’t Waste Time with Design Space’s Trace
Most crafters hit this wall: you have a PNG you love, and Design Space’s built-in trace just doesn’t cut it (pun intended). The trace produces jagged edges, picks up background noise, and loses all the detail that made you want the design in the first place.
You don’t have to settle for that. Lineart.ink converts any PNG or photo to a clean, cut-ready SVG in seconds. The AI doesn’t just trace color boundaries like Design Space does. It actually understands what’s in your image: what’s a line, what’s background noise, what’s a compression artifact. The result is smooth paths with minimal nodes that cut cleanly and weed easily.
Upload a photo, get a cut-ready SVG. No Illustrator skills needed, no 30-minute cleanup sessions in Inkscape.
100 free credits. Upload your image and get a cut-ready SVG in seconds.
Convert a PNG to SVG NowThe SVG Quality Gap
Not all SVGs are equal. The quality of the vector paths matters a lot for cutting.
Too many nodes
Every SVG path is defined by nodes (anchor points). Auto-traced SVGs from low-quality converters often have paths with hundreds of unnecessary nodes. More nodes means:
- Rougher cuts. The blade changes direction at every node, so excessive nodes create a jagged cut line
- Slower cutting. More instructions for the machine to process
- Harder editing. Try moving one anchor point in a path with 500 nodes
Design Space has a path complexity limit. SVGs with too many nodes can fail to upload entirely.
Stray artifacts
When a tracer picks up background noise, paper texture, or compression artifacts, those become tiny cut paths scattered around your design. You have to manually delete each one in Design Space before cutting, or they’ll waste material and jam your blade on tiny useless pieces.
Broken paths
Poor tracing can split what should be a single continuous path into dozens of disconnected fragments. Instead of one smooth cut around a letter, you get 15 tiny cuts that don’t quite line up.
Lineart.ink’s AI avoids all three of these problems. It produces clean paths with optimized node counts, no stray artifacts, and no broken fragments. The SVGs are ready to cut straight out of the converter.
File Format Cheat Sheet
| Format | Type | Cricut | Silhouette | Best For |
|---|---|---|---|---|
| SVG | Vector | Yes | Studio Designer Edition+ | Cut files, layered designs, vinyl |
| PNG | Raster | Yes | Yes | Print Then Cut, sublimation |
| JPG | Raster | Yes | Yes | Print Then Cut (no transparency) |
| DXF | Vector | Yes | Yes (all editions) | Silhouette Basic users who can’t open SVG |
| EPS | Vector | No | Studio Designer Edition+ | Professional print workflows |
Silhouette Studio and SVG Files
If you use a Silhouette machine, heads up: Silhouette Studio Basic Edition cannot open SVG files. You need the paid Designer Edition upgrade ($49.99 one-time) or higher.
If you’re on Basic Edition, you need DXF files instead. DXF is a vector format that all Silhouette Studio editions support. The downside is that DXF files lose color and grouping information, so you’ll need to manually organize layers after import.
This is why SVG sellers on Etsy typically include DXF files in their bundles, to serve Silhouette Basic users.
SVG Restrictions in Design Space
Design Space supports SVGs, but with some limitations. If your SVG isn’t working, check for these issues:
- No gradient fills. Solid colors only. Gradients get flattened or ignored
- No pattern fills. Repeating patterns or textures won’t render
- No embedded images. If your SVG contains a linked or embedded raster image, it won’t upload properly
- No clipping paths. Masked areas may display incorrectly
- Text must be converted to outlines/paths. Editable text in an SVG will cause upload problems. Always “convert to outlines” or “expand text” before exporting
- File size limit: 100MB. Overly complex SVGs with thousands of paths may hit this
- Auto-resize: 12 inches max. SVGs larger than 12 inches on the longest side get automatically scaled down
Common Scenarios
“I found a design online but it’s only a PNG”
This is the most common situation. You see a great design on Pinterest or Google, but it’s a raster image. Your options:
- Use Design Space’s trace. Free but often poor quality, especially on complex images
- Manually trace in Inkscape. High quality but takes 30-60 minutes per image
- Convert it with Lineart.ink. High quality, takes seconds, handles noise and artifacts automatically
For most crafters, option 3 saves hours. You upload your PNG, the AI generates a clean SVG, and you’re cutting within minutes. Your free 100 credits are enough to convert 5 images and see the difference for yourself.
“I drew something by hand”
Take a photo of your drawing and convert it to SVG. Hand-drawn art converts really well because the lines are intentional and distinct from the background. Use thick markers on white paper for the best results (see our kid’s drawing to vinyl guide for detailed tips).
“I have a logo that’s only in PNG”
Logos are ideal candidates for conversion. They’re usually simple, high-contrast designs with clean edges. If you have access to the original designer, ask for the SVG/AI/EPS source file first. If not, conversion works great on most logos.
“My SVG layers aren’t separating in Design Space”
This usually means the SVG was exported with all elements on one layer, or the paths all use the same fill color. Check that each color in your design is a separate group or path with distinct fill colors. In Design Space, you may need to Ungroup the uploaded image to access individual layers.
“My text is cutting as individual letters, not as one piece”
In Design Space, select all text elements and use Weld to join overlapping letters into a single cut path. Without welding, each letter cuts separately, which means overlapping parts get cut twice and fall apart.
How to Get SVG Files
Buy them
Sites like Etsy, Creative Market, and Design Bundles sell SVG files. Individual designs run $1-$5, bundles of 20-200 designs sell for $10-$50. Look for bundles that include SVG + DXF + PNG to cover all machine types.
Create them
Use design software like Adobe Illustrator ($22.99/mo), Affinity Designer ($69.99 one-time), or Inkscape (free) to create vectors from scratch. Requires design skills and time, but gives you complete control.
Convert them
Turn your existing PNG/JPG images into cut-ready SVG files. This is the fastest option when you already have the image you want. Lineart.ink does this in seconds with AI, producing clean paths optimized for cutting machines. No design skills required.
Quick Tips
- Always choose SVG when a seller offers both PNG and SVG. The SVG will cut better every time
- Higher resolution PNGs convert better. If you must convert a PNG, use the largest version available. A 300 DPI image produces cleaner traces than a 72 DPI web thumbnail
- Simple designs convert best. A single-color logo converts more cleanly than a detailed photograph with gradients
- Weld overlapping elements before cutting. Text, connected shapes, and overlapping pieces need to be welded in Design Space to cut as one piece
- Convert text to outlines before saving SVGs. Editable text causes upload problems because the machine can’t load your fonts
- Test cut on scrap material first. Especially with converted files, a test cut reveals weeding issues before you waste good vinyl
- Keep your blade sharp. A dull blade struggles with the thin, irregular paths that converted art often has
Ready to Convert?
Related Guides
- Full conversion tutorial: How to Convert a Photo to SVG for Cricut
- Compare conversion tools: Best Image to SVG Converters Compared
- Fun craft project: Turn Your Kid’s Drawing into a Vinyl Decal with Cricut
- Sell SVG designs: How to Create Text-Based SVGs for Print on Demand
- Made for Cricut: SVGs for Cricut & Silhouette | Laser users: SVGs for LightBurn & Glowforge
Stop fighting with Design Space’s trace feature. Upload your PNG and get a clean SVG in seconds.
100 free credits. No credit card required.
Convert Your First Image Free